
Blog Layout
Home Canning Tips – Steps to Getting Started
Nicky Becky • Feb 04, 2021
Everything You Need to Know for Home Canning
Home canning is one of those old-time skills that has become more popular in recent years. And no wonder. Preserving your own peaches, pears, tomatoes, or cucumbers is one of the most satisfying ways to preserve your garden’s bounty. And with more and more farm stands selling produce by the case, home canning is also a great way to take advantage of other gardener’s bumper crops.
With a little practice, home canning is a safe and economical way to preserve the freshest food at its peak of flavor. Even beginning canners can create homemade specialties like jams or pickled beets that make treasured gifts. As more people are looking for options that let them eat and live locally, home canning offers an opportunity to capture seasonal produce in ways that allow us to enjoy it all year long.
History of Canning in America
Canning has been a part of American history for over 200 years. While Americans have been preserving food since they landed on Plymouth Rock, the early techniques focused on smoking drying, smoking, fermenting, and packing in foods in fat. Jars and crocks were sealed with wax or fat, and alcohol and vinegar were added to stave off spoilage. In the early days, preserving foods was often unreliable, and didn’t always work as planned. Spring houses and underground storage were also used as a method of cooling preserved food in every season.
In 1795 Napoleon famously offered a reward of 12 thousand francs for the invention of a more reliable food preservation method, and the development of tin cans soon followed. However, the research done in this area also produced a wide range of other improvements in home preservation, including home canning, and Americans started to change the ways they prepared and stored food.
In 1858 the Mason jar was patented, followed by Ball jars in 1884. By 1903 Kerr Glass was also manufacturing jars and an array of home canning supplies. History records that home canning in the U.S. reached its peak during World War II, when Americans canned, or “put up,” more than four billion cans and jars of produce and protein as part of the war effort.
After the end of World War II, home canning dropped in popularity and was soon practiced only by farm families looking for ways to preserve produce from home gardens. But in the 1970s, the whole foods movement began to grow, and American rediscovered their love of gardens and local foods. Today, a new generation of DIYers have embraced home canning as a practical and wholesome way to provide the best quality foods for their families.
Canning Preserves Freshness and Nutrition
A healthy diet should include lots of fruits and vegetables, and many people believe fresh produce is the most nutritious way to consume the bounty of the garden. However, most fruits and vegetables begin to lose their nutritional value the moment they are harvested. Without proper refrigeration, about half the vitamins can be lost within a few days unless the food is preserved. Even with adequate cooling, most fresh produce will lose a significant percentage of vitamins and minerals within a few weeks.
But once canned, most fruits and vegetables keep their nutrients for much longer periods. In fact, If fruits and vegetables are handled properly and canned within a day of harvest, they are often more nutritious than the fresh produce found in stores. There are a few exceptions. It’s important to note that the heating process using during home canning can destroy about half of the vitamins A and C, thiamin, and riboflavin in many types of food.
Regardless of which types of fruits, vegetables, beans, or meats you choose to put up, once you learn the art and science of canning, you’ve found one of the best methods to prevent lost nutrition or spoilage.
How To Can In Six Easy Steps
Canning may seem complicated and scary, but it’s not more difficult than many other types of food prep. While each recipe and situation is a little different, there are basically six things you need to do to preserve your food successfully. As with any food preparation, there are many tips and trips that you will learn over time to ensure consistent success (and we offer some in this article.) With a bit of practice, these six canning basics will become second-nature, and you’ll soon find that canning is a satisfying and straightforward way to preserve nature’s bounty.
Get jars designed for canning, with self-sealing lids and rings. While it may be tempting to reuse jars intended for other purposes, proper vacuum sealing is an essential part of food-safety. If you can your food incorrectly, you may allow the potentially deadly growth of bacteria, especially dangerous for children and older adults. If you’re not serious about food safety, home canning is not for you. If you choose to use jars and lids other than the ones designed for canning, you are risk potentially lethal consequences.
Sterilize everything. Again, you must take food safety very seriously in home canning. To make sure your jars are scrupulously clean, you must submerge them in water, and bring it to a boil. Do the same for the rings you’ll use on your jars. To protect your jars from cracking, and to keep jars as sterile as possible, boil your jars immediately before filling with the product, not allowing time for the jars to cool.
Follow trusted recipes. The natural acidity of your food and ingredients must be considered when created safe canning recipes. While very experienced canners can begin to improvise recipes, beginning or intermediate canners should stick with recipes developed by highly regulated kitchens. Be sure to follow the recipes exactly. Even slight variations in the recipes may result in disappointing food, unappealing texture, failure of the jars to seal, or even food poisoning.
Heat to sterilize and to create a vacuum. Submerge the filled jar in boiling water for the time specified in your recipe. For high acidity foods, you may submerge your filled jars in a boiling water bath, and cover. For low-acidity foods, you’ll need to use a pressure cooker. Follow the recipe and heat for the specified amount of time.
For both methods, make sure you have a canning rack at the bottom that allows heat on all side of the jar and prevents the glass from absorbing too much heat and cracking. Regardless of which method you use, when you remove the jar, the unique lid design will heat to escape, also forcing out air. This creates an airtight vacuum, pulling the lid down, creating an airtight seal.
Cool completely. Once your jars have spent enough time in boiling water (or a pressure cooker) remove them with a set of tongs or a jar remover and let them cool for 12-24 hours.
Check seals. Once your jars have completely cooled, check the seals to make sure each jar has safely sealed. Canning lids have a special sealing compound that is activated when heat is present, and vacuums are created. This tight vacuum seal will help keep the food safe for a year or more
When canned properly, most two-piece lids will seal with a “pop” sound while they’re cooling. This happens as the lid gets pulled in by the vacuum created when the jar’s contents are cooling (and contracting) inside the jar.
To make sure your jars have properly sealed, let them cool for a day. Once completely cooled, remove the rings and test the seal of each jar. You can check by pressing on the lid with your finger. If the lid springs back, it is not sealed. Other tests include tapping with a spoon. A high, clear ring means the jar is sealed. A dull thud is a sign that the seal is not sealed correctly. Finally, some canners can spot issue by eye. The lid should be concave and curved in slightly at the center. If it is flat or bulging, the lid is not sealed.
If a jar did not seal, you may refrigerate it and use the contents within a few days. If the contents are freezer-friendly, remove the contents, place into an airtight freezer bag or container, freeze, and use within the next few months.
One of the most common issues with home canning is the failure to seal properly. This might have happened because there was a bit of produce on the rim of the jar, preventing the lid from adhering properly. Rims must be spotless. Using a wide-mouthed funnel may help. (Keep reading for more on funnels.)
Overfilling or underfilling is another common reason jars don’t seal. The amount of product in the jar is important. Too much and it expands in ways that break the seal. Too little, and it won’t create enough steam or heat to activate the seal.
In some cases, you may not have boiled your jars long enough, or the product inside may not have been hot enough to create a seal. And finally, in large batches, it’s normal to find one or two that don’t seal. Just put them in the fridge and use in the next few days.
Air bubbles or air pockets inside the jar will also interfere with the seal, so if you see any in your canned goods, use a long, thin sterilized butter knife or metal kabob stick to move the contents around to remove air pockets.
Get Ready to Can: What You Need, and Why You Need it
If you want to start putting up your own canned food, you will need a few pieces of special equipment.
Tongs
In canning, you must boil jars to sterilize them and to create a sealed lid. That’s why you’ll need a strong set of tongs to lift the scalding-hot jars out of the water. Canning jars can be heavy or slick, especially when they’re full, so it’s worth your time to find special canning tongs, called jar holders. They’re designed to grip round jars of almost every size. The best ones have rubberized or silicon coated grippers to make it easier to grasp a jar securely. Make sure they are tall or long enough to keep your hands out of the steam when removing jars from the dangerous, hot water.
Funnel
You’ll need to pour ingredients into your canning jars, and often those ingredients are very hot. It’s important to remember that even a speck of food on the rid of the car may prevent your canning lids from sealing. So, if you’re canning more than a handful of jars, it may be time to invest in a wide-mouthed funnel. These inexpensive funnels will allow you to fill your jars quickly and neatly, without spills. Sometimes called a canning funnel, they are available in metal or plastic. They are well designed to fit on top of pint or quart sized canning jars. Because they allow for more control, they’ll also make it easier to fill your jars to the proper level, which will improve your chances of the jars sealing correctly.
Measuring Cups
No, you don’t have to buy special measuring cups for canning. But most canning recipes call for large quantities, so you will find it’s easier to have an extra-large measuring cup (or two) on hand to help you manage large volumes. If you don’t have an eight-cup measuring cup yet, this might be an excellent time to get one.
Vessel
Sterilizing jars and heating canned goods are essential parts of home canning. And because you may be canning several quarts (or several dozen quarts) at a time, you’ll need a large vessel appropriate for canning.
If you want to limit your canning to a few pints of preserves using the boiling water method, a standard, covered Dutch oven is all you need. Make sure you add a small, round rack or even a kitchen rag at the bottom to allow water to circulate around the jars.
If you plan to can using quart-sized jars (or larger), you’ll need a 12-quart, 21-quart pot, or even 33-quart sized pot. Unlike some fancy cookware, these large canning pots are usually very affordable and often include a canning rack. These inexpensive pots perform just as well as the designer versions, so there’s no need to invest a lot of cash in your canning pot.
If you plan to preserve low-acid foods like vegetables or meat, you will need to invest in a large pressure cooker. A 23-quart sized will serve most canning needs. Most modern pressure cookers can also double a boiling-water canner for preserving high acid foods like jams and pickles.
Canning Racks
When canning food, you’ll need something to keep the jars off the bottom of the pot. This allows water to move around every part of the jar, and also prevent the glass from cracking.
If you purchase a canning pot or pressure cooker, most will include a simple canning rack. It may look like a wire trivet or be an elevated piece of metal with a few holes. Either option is entirely safe and functional.
Some home canners prefer to use a kitchen rag or a neatly folded tea towel at the bottom of the pot. Again, this is a safe and functional option.
If you want to purchase a canning rack, you have lots of options. Canning racks may be made out of stainless steel, chrome-plated steel, silicon, nylon, or a combination of materials. Some will allow you to keep jars steady in the pot, reducing rattling and reducing the chance of cracks. Most are adaptable to quarts and pint-sized jars. Others come with handles that fold over the edge of the pot, making it easier to remove hot jars. Most are quite affordable and long-lasting, so it’s easy to experiment and choose the one that works best for your preferences.
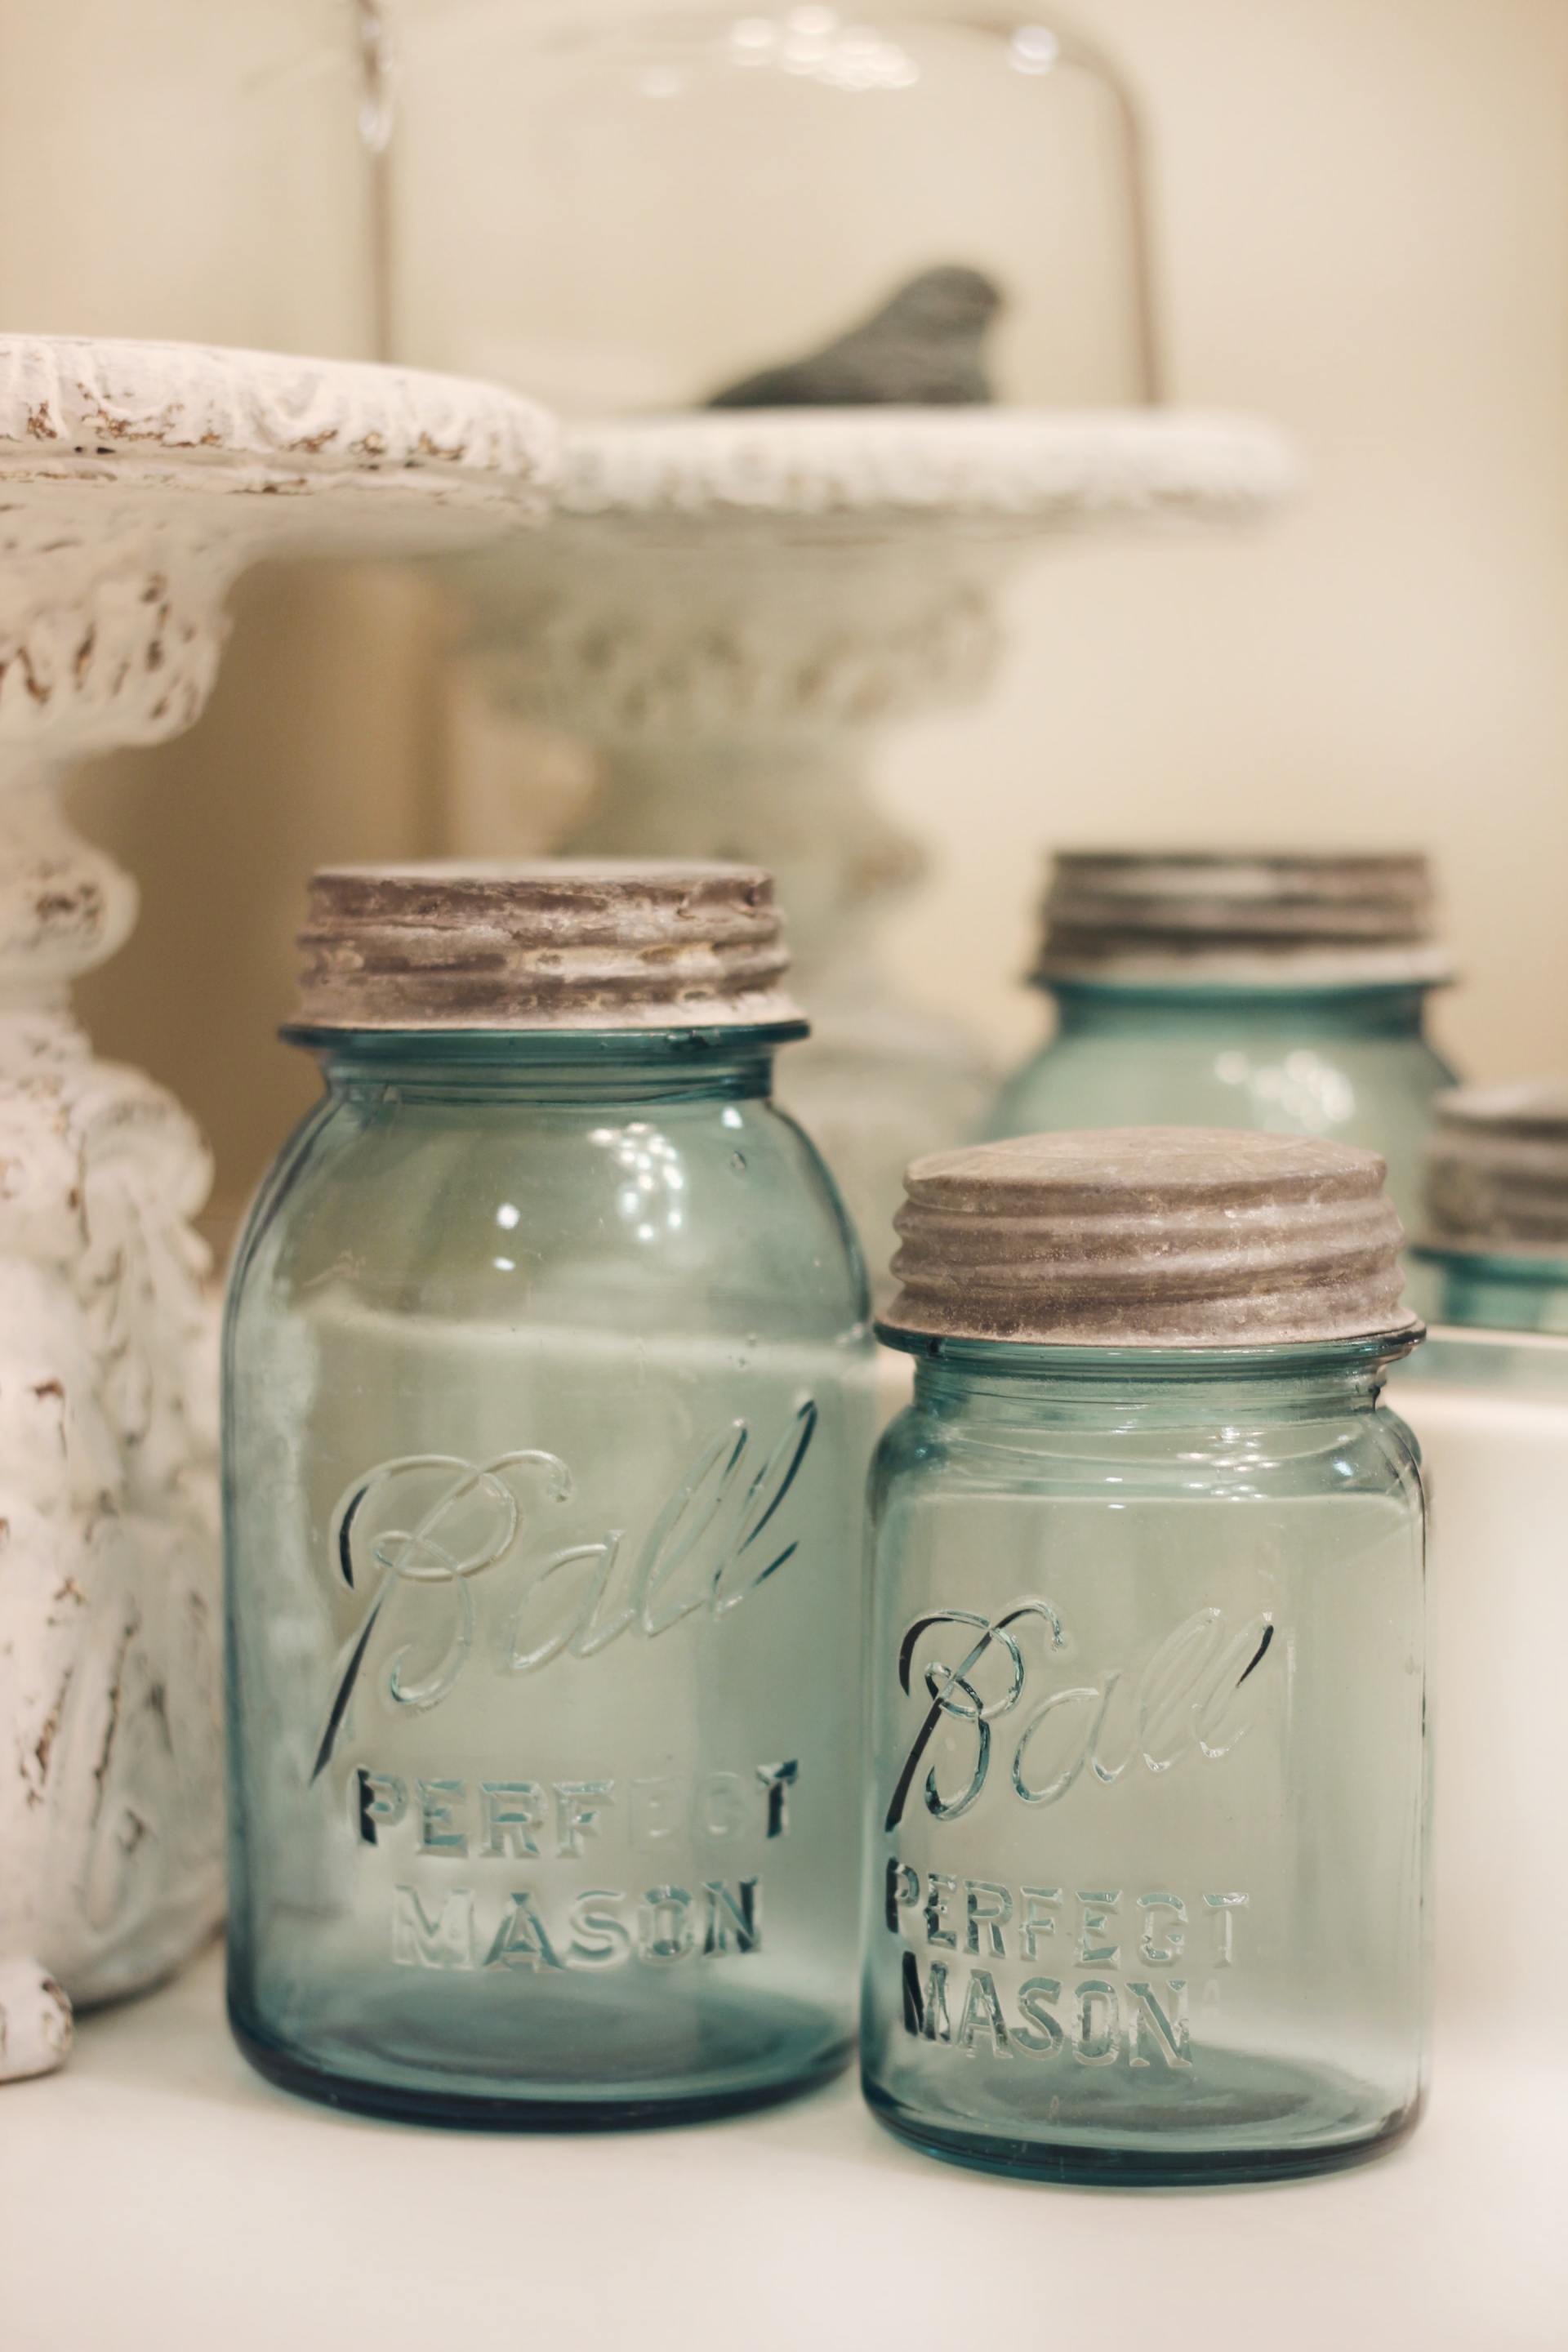
Jars and Lids
When it comes to canning, it’s crucial to find the right jars and lids. Safe canning can only happen when you have an airtight seal that holds over time. While there are some interesting designer jars available, stick to the basics. Ball and Kerr brand jars, also called mason jars, are the standard in the U.S., and most canning lids are designed to work with Ball and Kerr jars.
To keep your food safe and free of spoilage or bacteria, stick to self-sealing canning lids. Most canning jars are sold with lids and rings included, and you can reuse the jars and rings year after year. Self-sealing lids will need to be replaced after each usage. (And, of course, sterilize jars and rings before using again for your next canning project.)
Labels
If you’re canning just a few items, labels may not be needed, but if you’re canning a variety of items, or plan to give items as a gift, labels are a practical and attractive way to identify your canned goods.
Look for types that are easy to remove, so you can use your jars over and over without spending a lot of time removing old labels.
Whether you use computer programs, calligraphy, or good, old-fashioned handwriting to label your jars, avoid inks that fade quickly since these jars may be around for months.
If you’re more about practicality than aesthetics, use a black, permanent marker and write on the lid. Your contents will be clearly marked, and lids must be discarded after one use (so you don’t have to worry about removing labels.)
Recipes
Even if you’re an experienced cook, it’s not smart to make up your own canning recipes. Because the acidity and PH balance are critical to food safety, it’s wise to rely on reputable resources that use test kitchens and food scientists to ensure the safety of the recipe.
Remember that many blogs and online sites are run by people who may not fully understand the science behind canning or may not have the resources to test the pH or acidity of food properly. Approach online recipes with caution.
Some of our trusted web resources for canning recipes include:
The Ball and Kerr Home Canning Website: Get over 500 trusted recipes for canning everything from strawberry lemon marmalade to basic canned tomatoes. They offer free recipes for the boiling water bath method as well as pressure cooker canning and even include a few no-cook and freezer preservation recipes.
Better Homes and Gardens spends a lot of time testing recipes for taste and safety. They also bring in food scientists to test the safety of their recipes. While many online sites offer canning recipes, this free website can be trusted to provide canning recipes that are safe and reliable.
Bernardin Canning Website: This Canadian brand is a trusted, free source of hundreds of safe recipes for home canning. They also offer some interesting takes on old favorites like orchard fruit in chili sauce and Quebec pork meatballs.
The National Center for Home Food Preservation is a site developed by the U.S. Department of Agriculture to help home canners preserve food safely. While they do not offer recipes on this site, they do provide detailed canning tips for each type of food and variety of recipe. So if you have a family recipe you want to try, and want to make sure it’s safe, this is the resource for you.
We Can’t Say it Enough: Be Safe and Prevent Botulism
Throughout this article, we’ve continually warned about food poisoning. Home canners must watch for any foods that may lead to botulism. This is a rare but potentially fatal form of food poisoning, and the most common cause is eating improperly canned food. Clostridium botulinum is a type of bacteria found naturally in the soil. Because they grow only in the absence of air, they are harmless on fresh foods. They can cling to produce, especially in areas of rot, or foods with even slight bruises. It is also present in meat and seafood. Once in a sealed canning jar, this type of bacteria can quickly multiply, producing a deadly toxin. If ingested, this toxin can affect your nerves, paralyze you, and even cause death. Even taking a small taste of food containing this toxin can be deadly.
To prevent contamination, start with only the freshest food. Don’t use food that has begun to rot or decay or that has soft spots. Use only the freshest meats or seafood.
Another step to in prevent food poisoning is sterilization. Place your jars and the rings you’ll use for your lids in a large pot of lukewarm water and bring to a simmer. The water must be at boiling point, but you don’t need to boil the jars for long to sterilize. Once the water has come to a boil, use tongs to remove the jars and rings. (Specially designed canning tongs, called jar lifters, are perfect for this task.) Treat sterilized jars carefully to keep them germ-free. Place them on a clean cloth on a sterilized surface, away from food, people, or other tools or kitchen items. Don’t touch sterilized jars with hands or unsterilized instruments. To prevent recontamination, sterilize your jars just before filling with canning contents and remove from the water just as you are ready to start filling.
The third preventative measure is pressure cooking. While some foods can be canned using a large pot and boiling water, low-acid foods require a pressure cooker. Why? Foods like oranges, strawberries contain too much natural acid to allow this dangerous bacteria to grow. Most fermented foods with high vinegar content like sauerkraut and pickles, also kill the bacteria naturally.
Use this list as a guideline.
High Acid Foods: Boiling Water Bath
Most fruits, including;
Apples and apple sauce
Apricots
Blackberries
Blueberries
Cherries
Grapes
Jams and jellies (fruit only)
Peaches and nectarines
Pears
Pie fillings (fruit only)
Pineapple
Plums
Oranges
Raspberries
Strawberries
Acidified and fermented foods, including;
Chutney
Pickled vegetables
Pickles (cucumbers)
Relishes
Salsa
Sauerkraut
Tomatoes (usually)*
*Note that tomatoes are borderline. Some have high acid and can be cooked using a boiling water bath. Some are low acid and require a pressure cooker. If unsure of your tomatoes’ acidity when using a boiling water bath, add a tablespoon of lemon juice or a quarter teaspoon of citric acid for each pint canned.
Low Acid Foods: Require a Pressure Cooker
Most vegetables, including;
Asparagus
Beets
Cabbage (except sauerkraut)
Carrots
Cucumber (except pickles)
Eggplant
Green beans
All dried beans, including baked beans
Okra
Onions
Peas
Hot and sweet peppers
Potatoes
Pumpkin and squash
Spinach
Tomatoes (sometimes)
All meats and animal proteins, including;
Beef
Poultry
Mincemeat pie filling
Seafood
Shellfish
Wild game
Soups and stews
We hope this article help you start a successful canning campaign! If you have trouble finding the canning supplies you need, feel free to visit your local True Value Hardware & Home Improvement Store for a large selection of Houseware
products.

7 Plants You Should Plant Right Now For Springtime

5 Home Improvement Job Ideas That Will Add Massive Value To Your Home in 2024

10 Step Checklist To Make Your Home The Most Festivous On Your Block This Christmas Season

These are the ten easy home improvement steps you'll need to take to get your home ready for the fall season!

Now that you've prepared your home for the summer season, it's time to learn how to keep it as cool as possible... while saving some money!

Your 10-Point Home Improvement Checklist To Get Your Home Summer-Ready During The Springtime
Make your neighbors jealous of your lawn this spring. Follow these steps, and you'll have the most beautiful lawn on your entire block!

Follow these easy steps to make sure your home is protected from this winter's harsh weather!
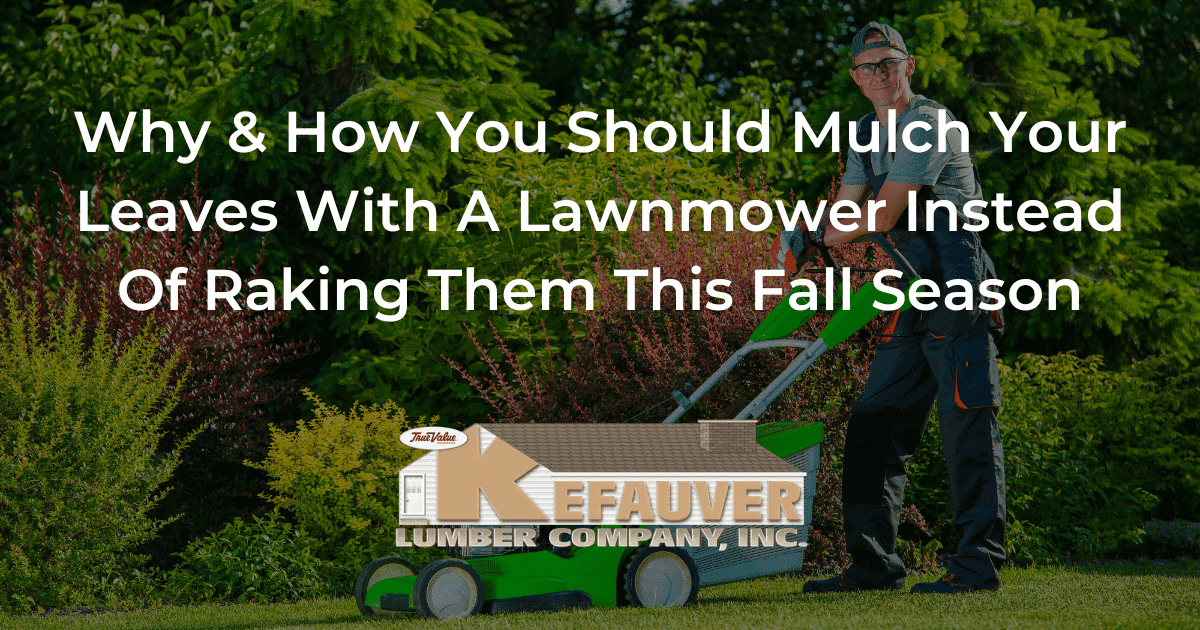
In this blog post, Kefauver Lumber Co. outlines why & how you should mulch your leaves with a lawnmower this fall season, instead of raking them.

Here's a list of 5 easy things you can do yourself to make your garden look beautiful in the spring of 2022.